Portable Custom Boombox
Sunday, Aug 18, 2019
Tags: project, portable custom boombox, waterproof, bluetooth, marine, radiocooler
(a.k.a. radio cooler v2)
The custom radio cooler (and other prior art) I built in college has been dragged all over the place between tailgates, pool days, the beach, camping, and hunting trips. It is a complete workhorse optimized for battery life and durability at the cost of portability (the 100 Ah battery weighs a ton!). I decided I wanted to build something sleeker and more portable, so that’s what I did.
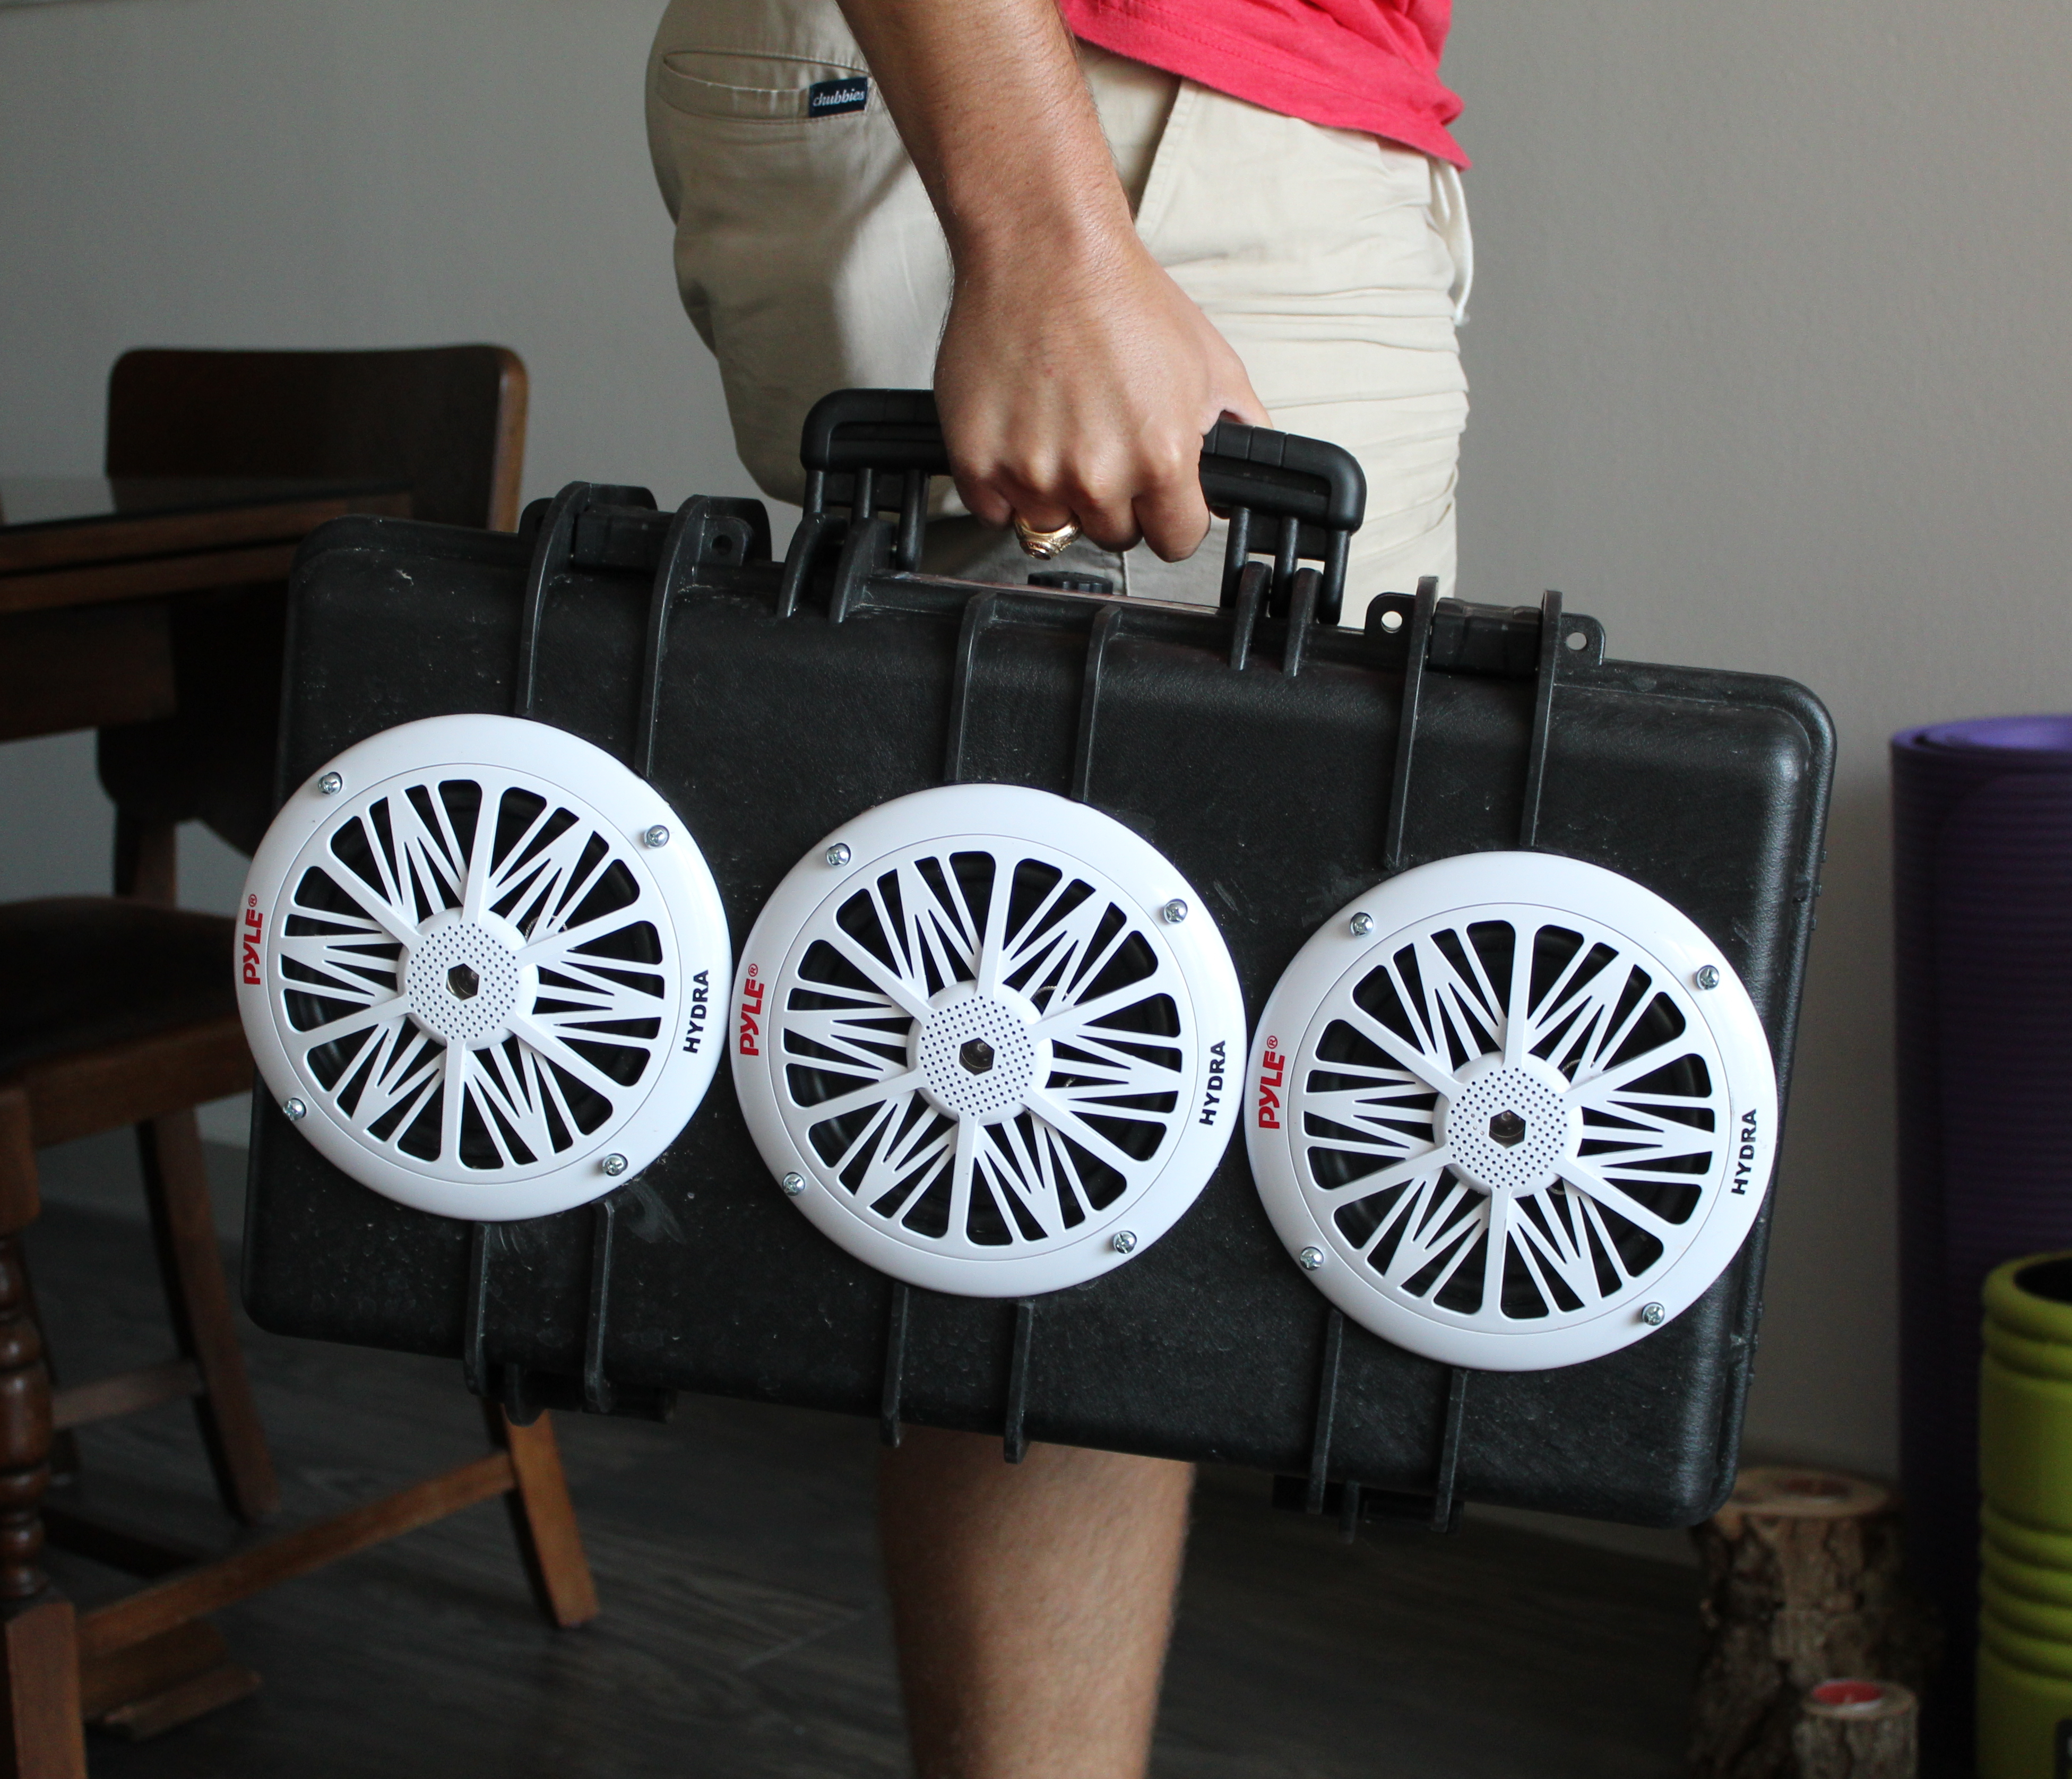
The first step was choosing some type of case. Coolers are pretty convenient because they’re easy to cut through and they can be fairly water resistant but they are also difficult to seal well. I began looking at electrical junction boxes (and I still think one could work quite well) but many had awkward dimensions and I wasn’t sure if drilling or cutting through them would work well. I finally settled on a latching plastic case meant for electrical components or firearms. It seals well and has a convenient handle already installed. It also was long enough to fit three speakers.
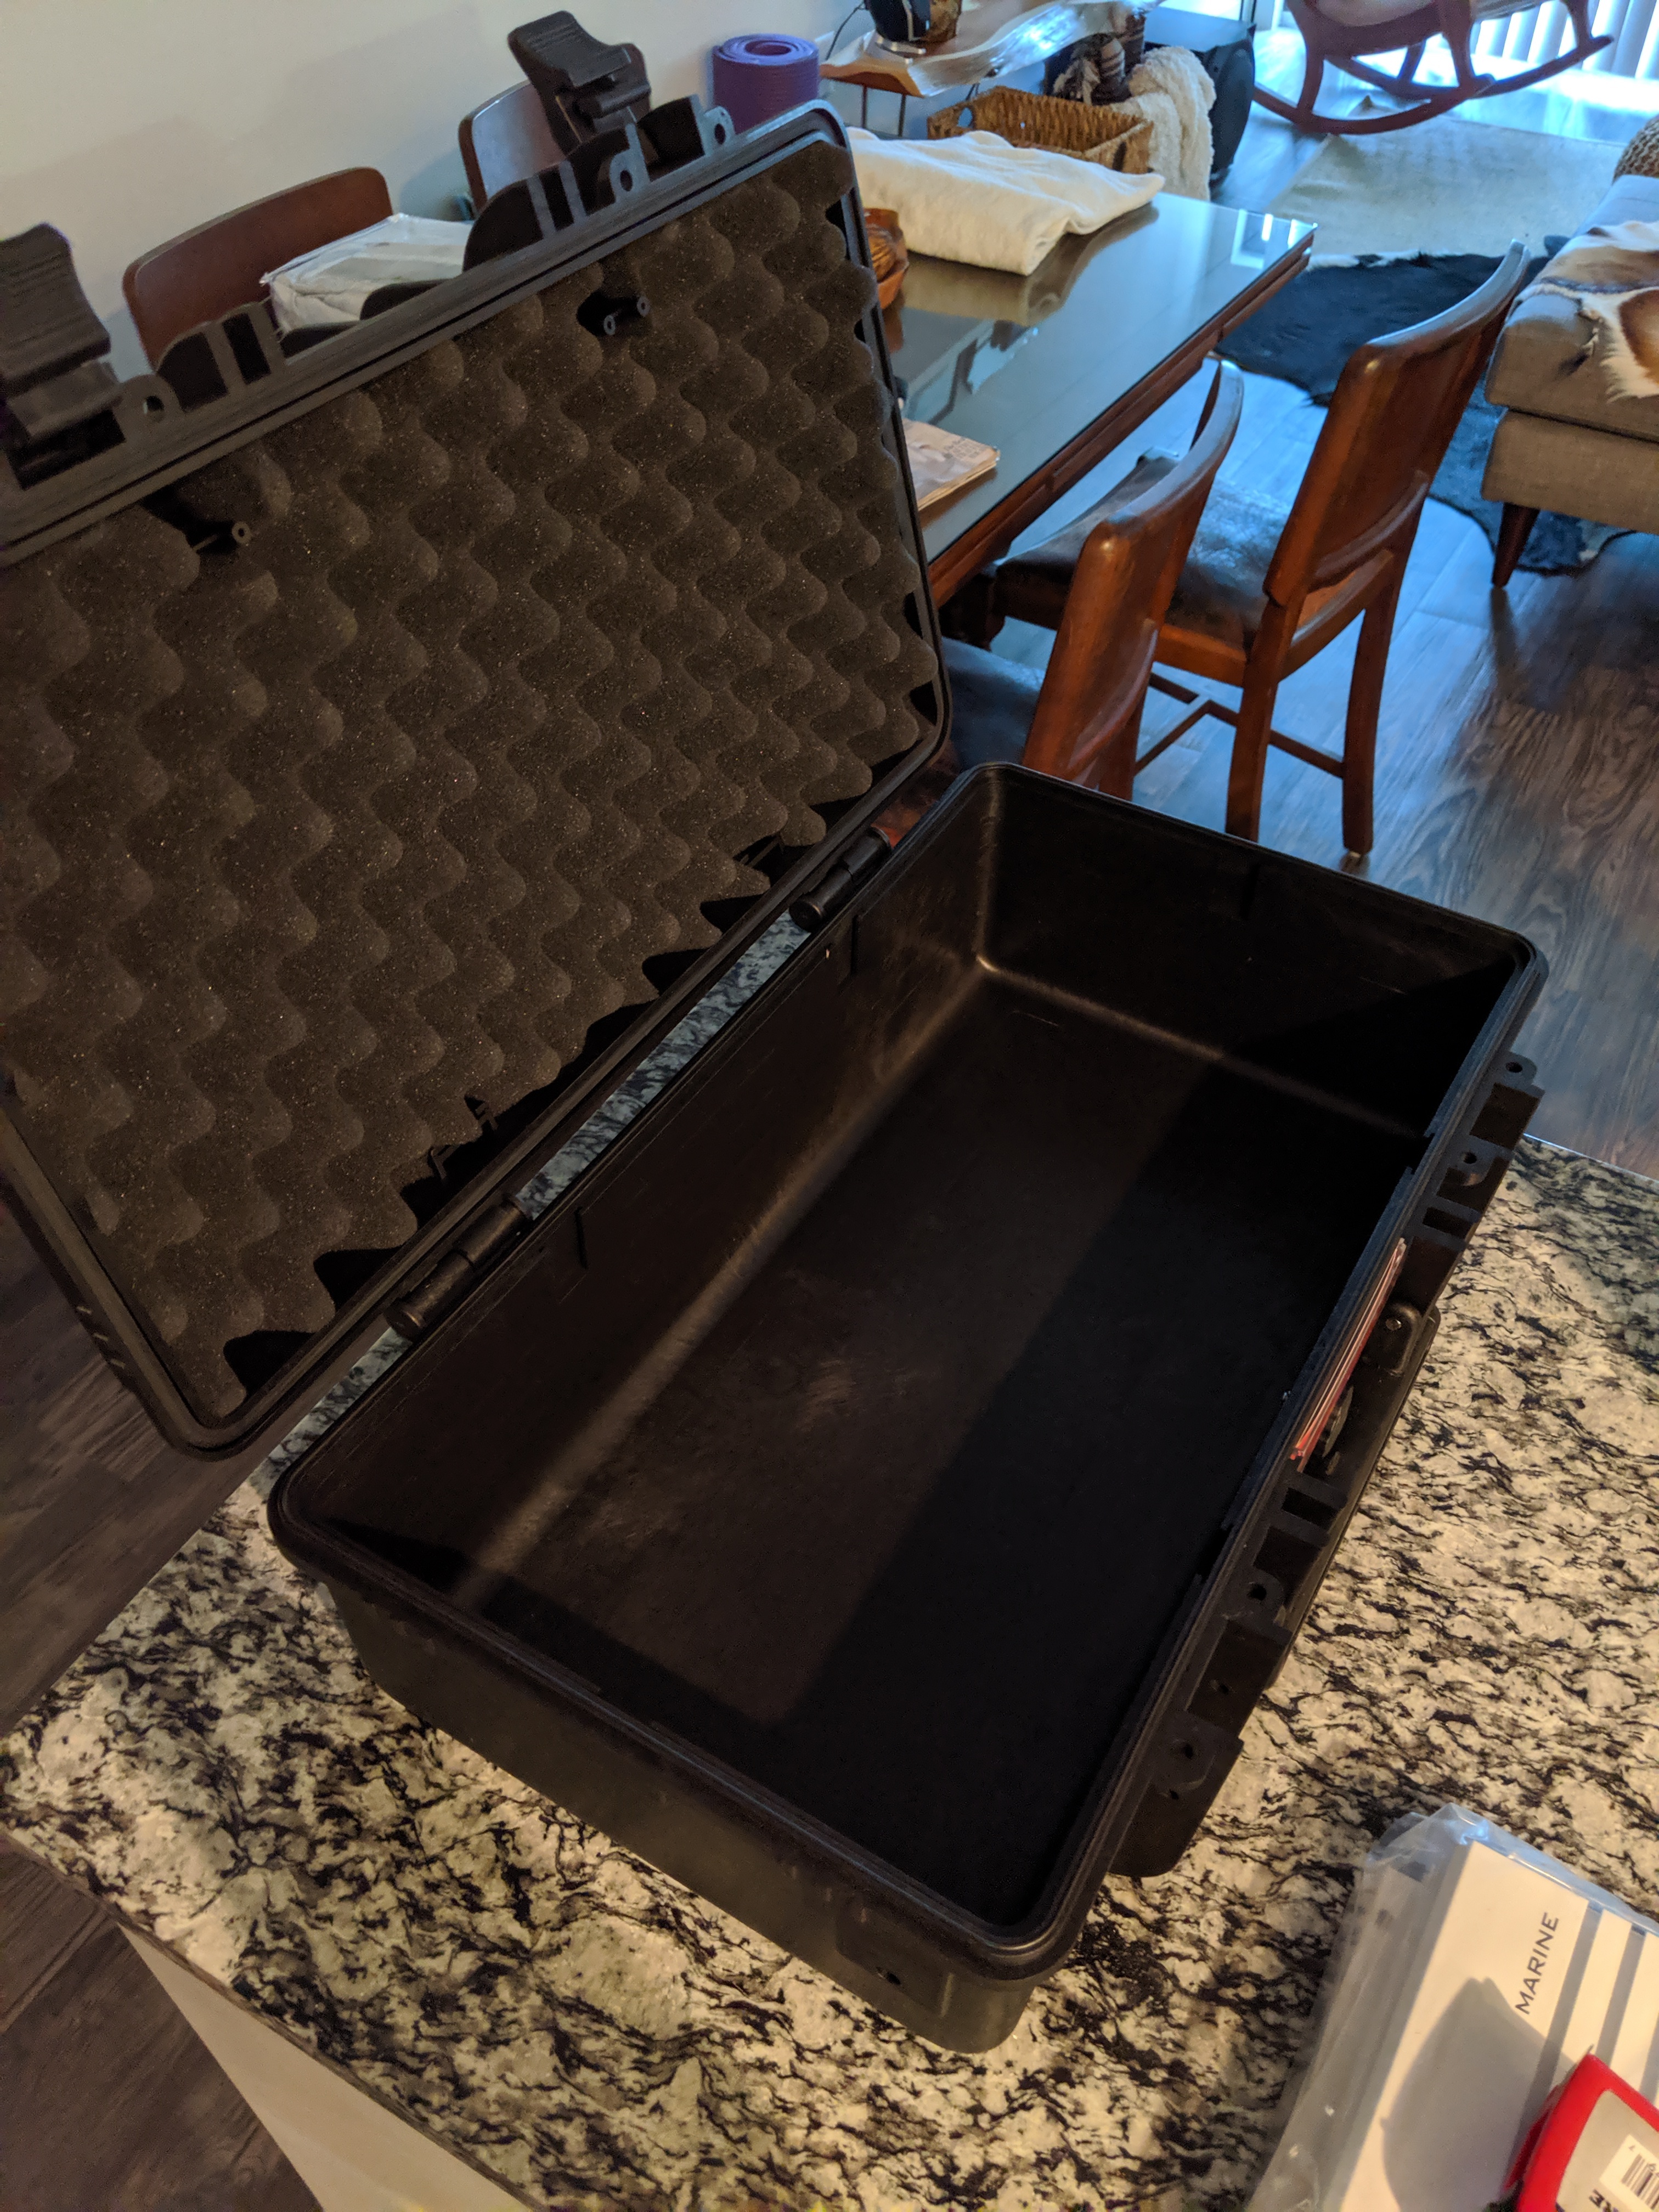

The case is quite spacious inside. I placed the amplifier in first to size it up but I definitely researched the dimensions of everything before purchasing.
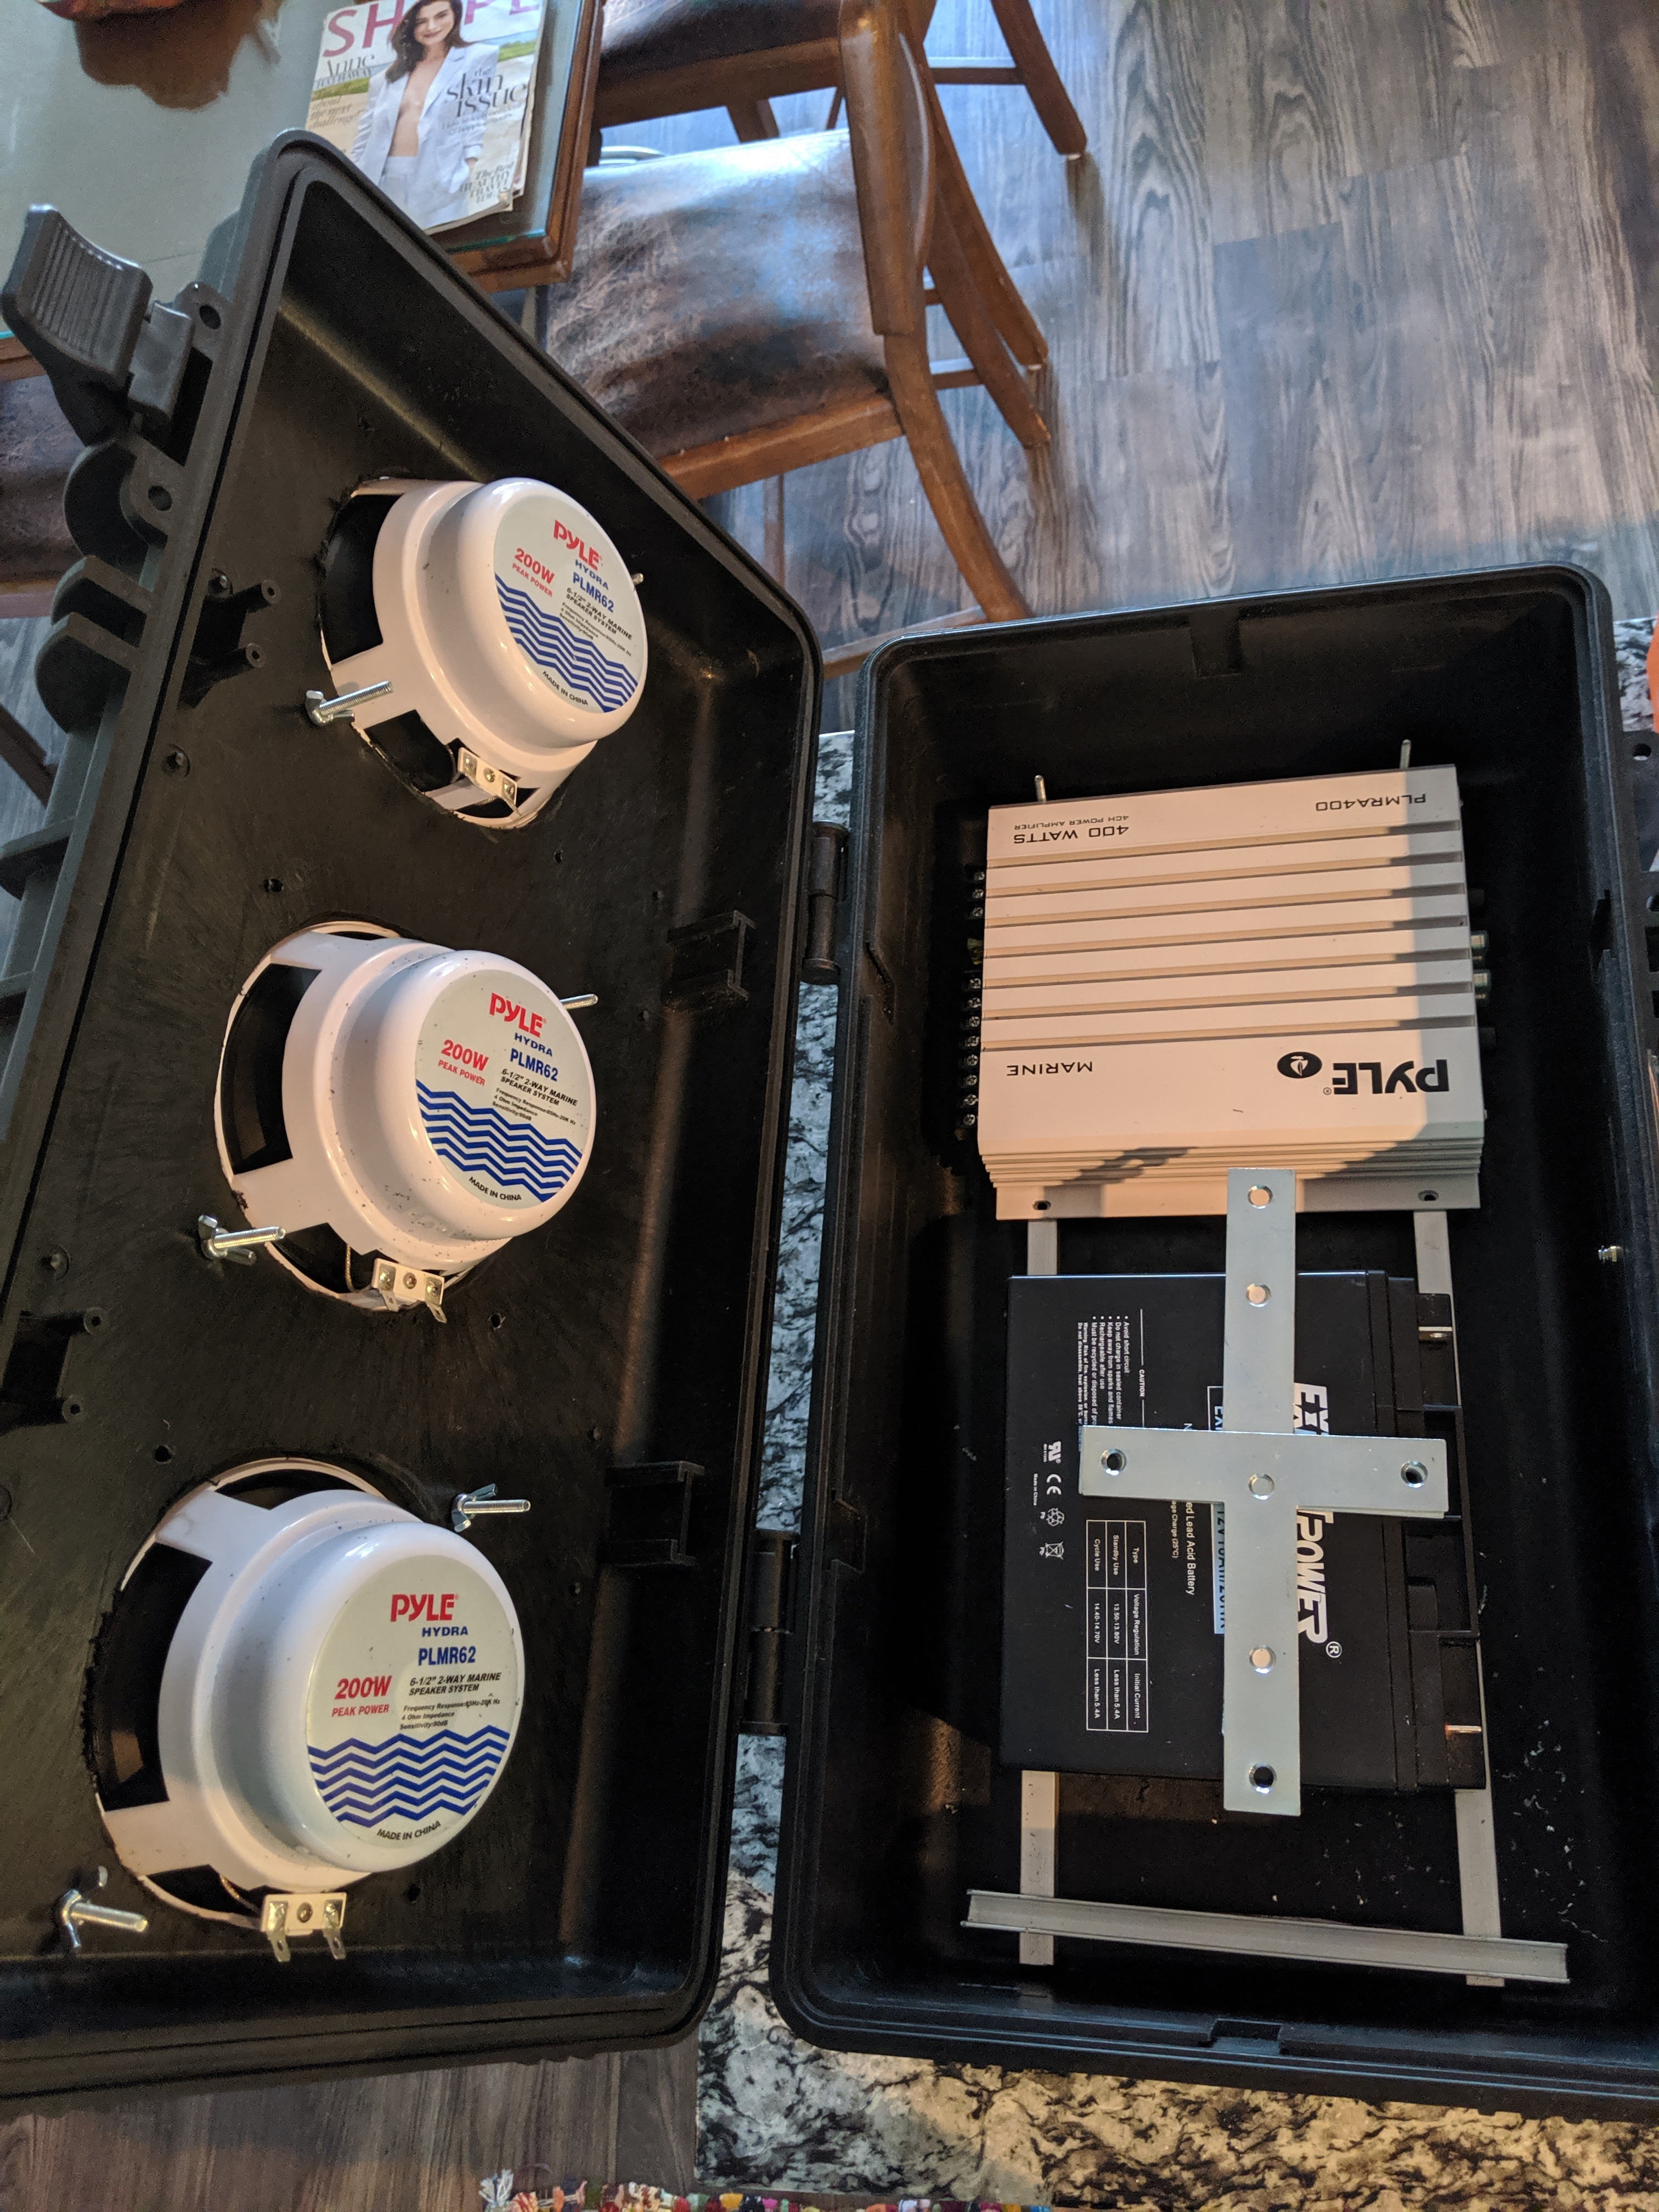

I carefully measured and cut out holes for the speakers using a dremel tool. I used a tiny cutting wheel to get a rough shape first and then used one of the sanding heads to round them out. If I were to do it a second time, I would tape templates down from the start to get perfectly round holes. After cutting the holes, I installed the speakers using bolts and wing nuts as well as a bit of silicon sealant around the speaker beds.
The components on the inside are mounted via aluminum C-channel I found at Home Depot. It was inexpensive, reasonably strong, light weight, and shouldn’t rust if any moisture gets inside. The two T brackets ended up getting mounted behind the battery to C-channel two cross members. The battery is 12V/20Ah sealed unit I picked up on Amazon. The entire assembly is mounted to the case at 4 anchor points: 2 to the bottom of the battery and two at the place where the lower amplifier holes are.
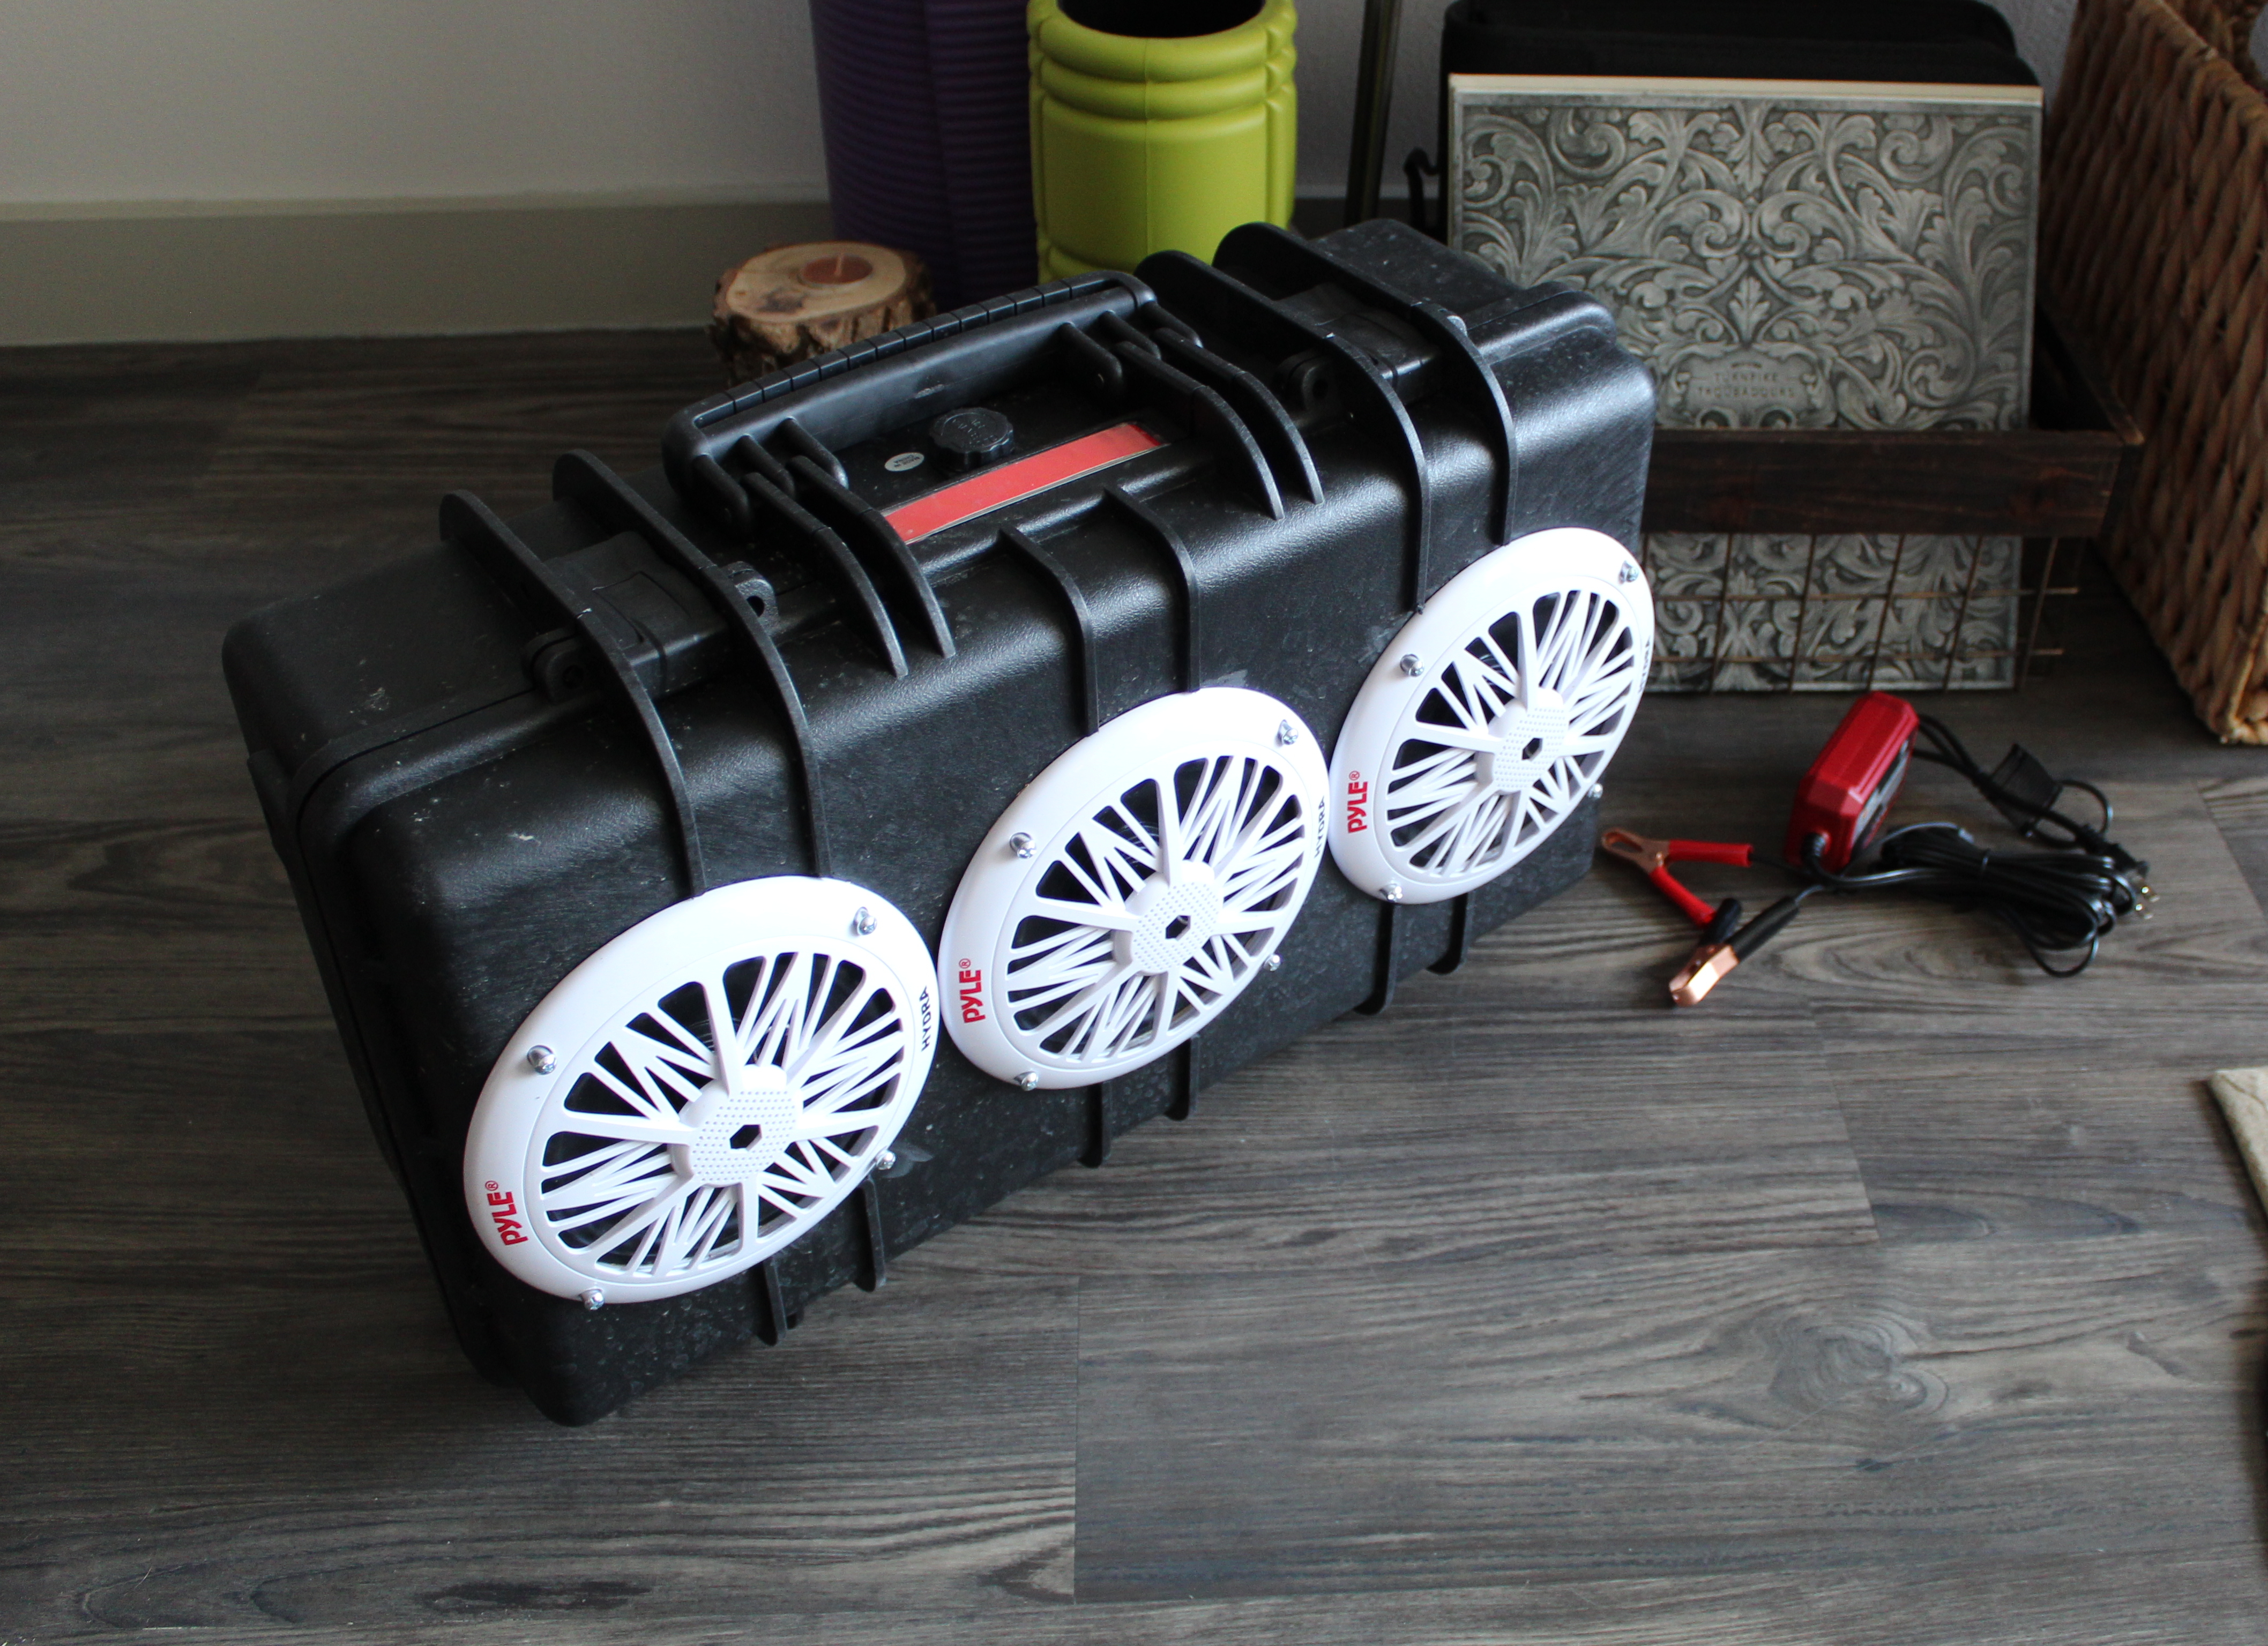
The finished boombox looks quite nice from the front and uses a small trickle charger to charge up. It sits easily upright though I would love to have a way to also sit it on its side so the three speakers were stacked. The sound is very directional (somehow to my surprise) so it’s best placed facing the direction you want the sound to go. The volume of the case with all components installed seems close to the right size to get good speaker suspension – bass is loud and even shakes the lid some. I usually connect with bluetooth to my phone, and Spotify has an integrated equalizer (deep in the settings) I’ve used to fine tune.
The inside of the boombox is reasonably organized. The battery is strapped in place with paracord (as not to jar the battery as much if the boombox is knocked in to) and a switch is placed alongside the bluetooth receiver module. I highly recommend the JL Audio unit; I tried multiple cheaper ones and they all had terrible background noise. The little round piece attached to the battery is a small 2-port USB hub with screen that shows the battery voltage to give an approximate idea of charge level. I eventually uninstalled it because it drained the battery, and moved the bluetooth unit’s circuit to go through the switch, so it drawn nothing when off now.
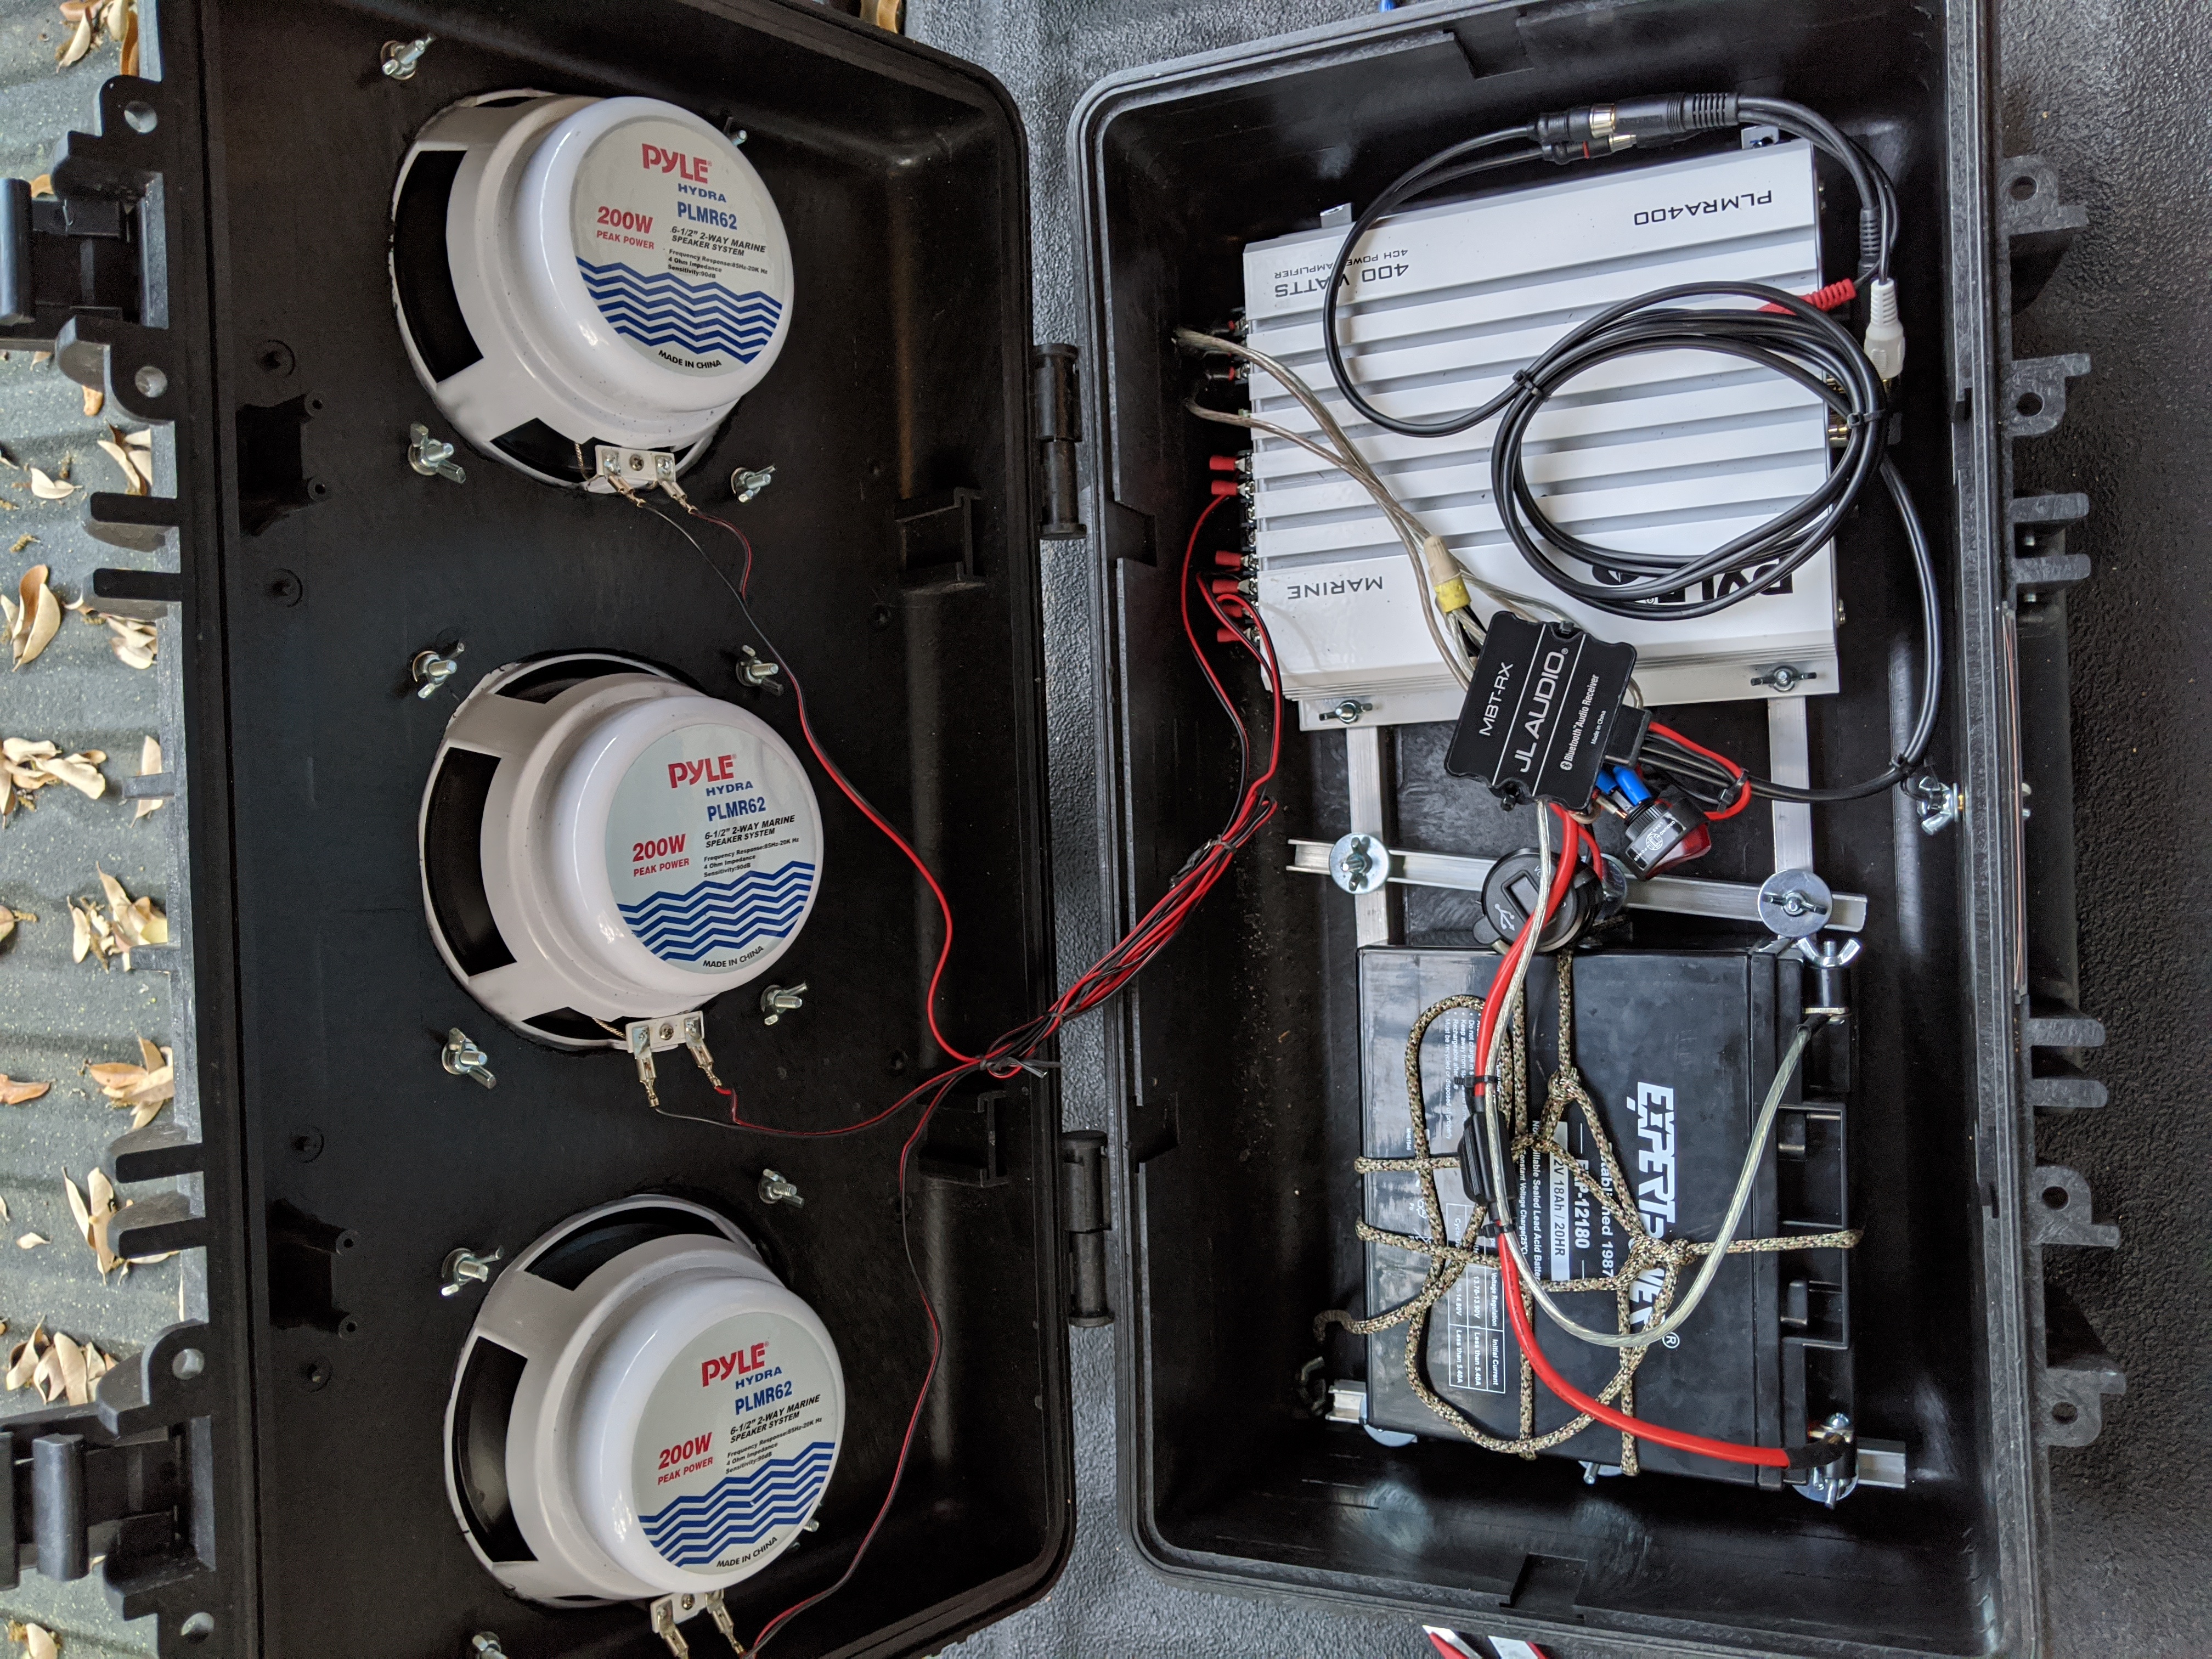
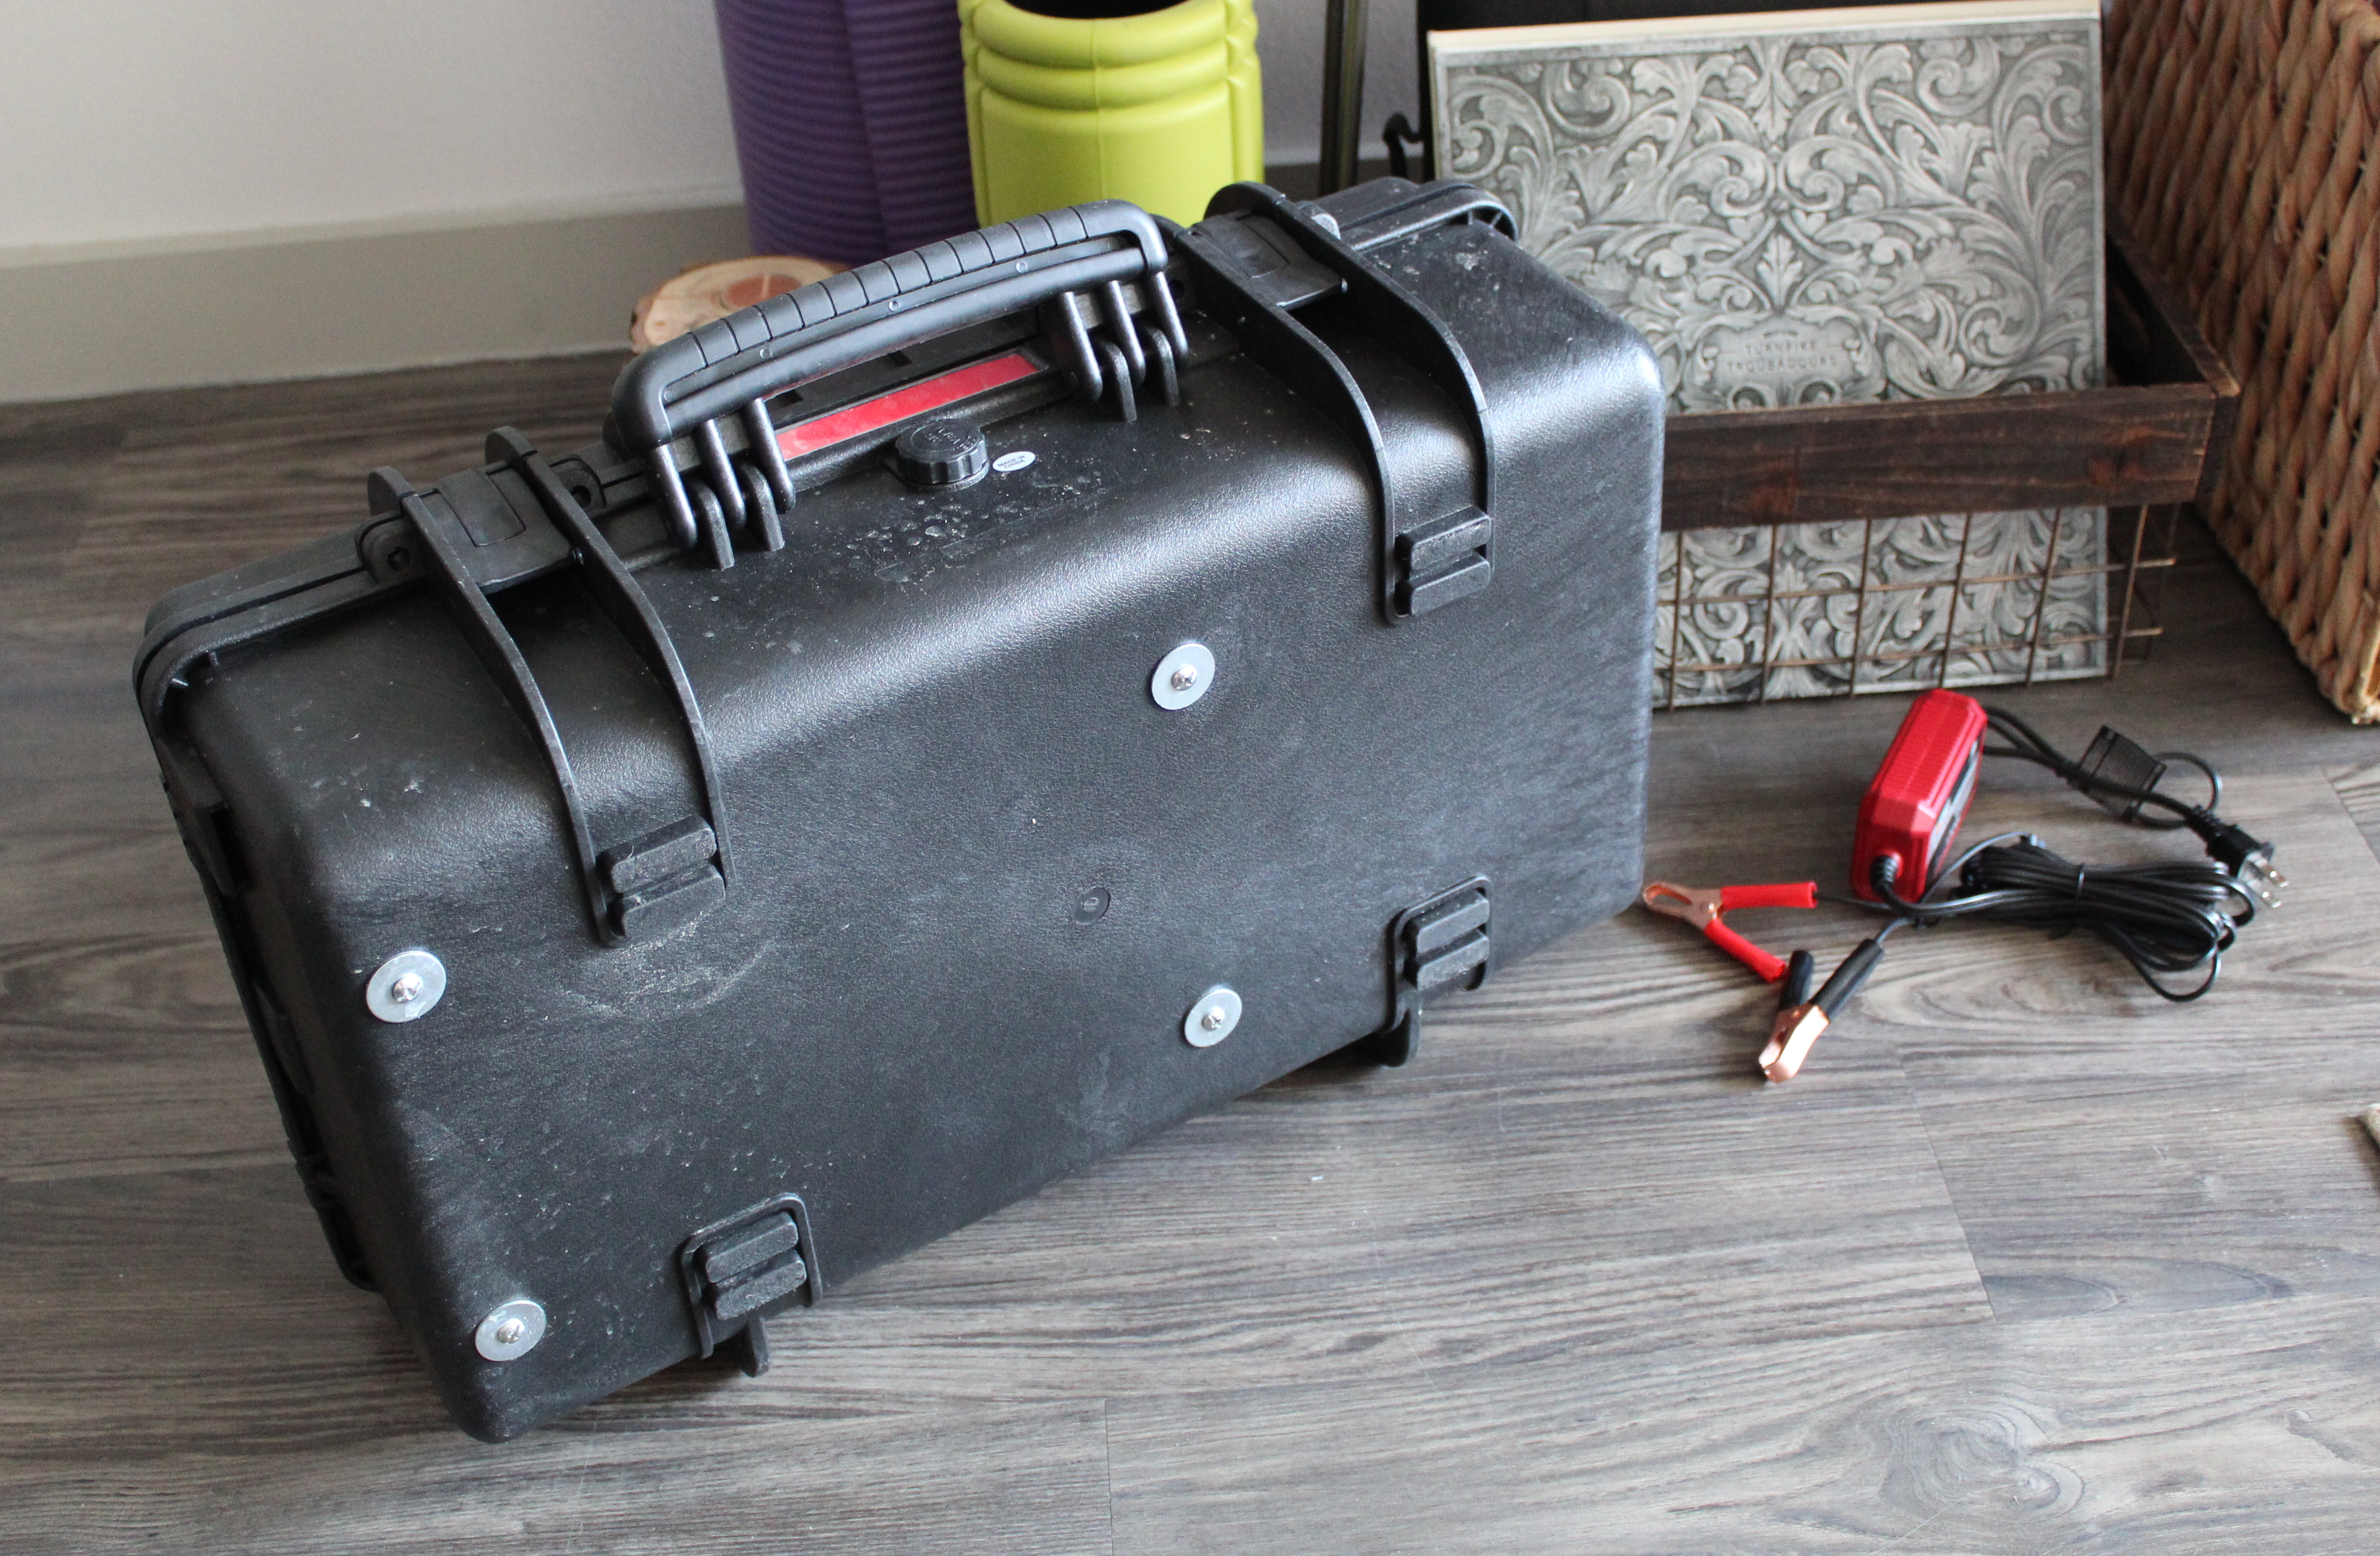
The rear only contains 4 mounting bolts which can be easily sealed with silicon caulking. The boombox is significantly more portable than the previous iteration and can be carried with one hand like a suit case.
Parts List
Here’s a non-exhaustive list of what I used for this build. Including hardware one of these can be built for around $350. It’s way louder than the all-in-one stereo units you can find at Costco or Sams Club.
- Monoprice Weatherproof/Shockproof/IP67 Hard Case - At around $80 this thing is very sturdy, keeps water out, and comes with a sturdy handle.
- Two 6.5 Inch 2 Way Waterproof and Weather Resistant Marine Speaker Pair (100 RMS/200 Peak each) - I tried Pyle this time despite really liking the Boss speakers I used for the previous build. No complaints yet and cheap; only $25 a pair.
- Expert Power EXP12180 Sealed Lead Acid Battery - $40 for 18 Ah. It lasts at least 6 hours (haven’t ran it longer yet and too lazy to try and calculate it).
- Pyle Hydra Marine 400 Watt 4 Channel Audio Amplifier - ($43.55) - I used this in my previous iteration. It’s powerful, extremely reliable, and sounds great. The form factor is perfect.
- Either a 3.5mm to RCA pair auxilliary cord or a bluetooth module like this JL Audio MBT-RX Bluetooth Audio Receiver. I’d recommend this bluetooth receiver – it sounds really good. Get a toggle switch for it.
- 12V Trickle Battery Charger - ($16.98) - Inexpensive and better on your battery but expect long overnight charge times. A battery charged too quickly will have less total recharge cycles - a low current trickle charger optimizes for battery longevity.
- One Male to 2 Female RCA Speaker Splitter Pair to split the output of a stereo input from aux of bluetooth into the 4 channels for the amplifer
- A package of these 90 degree RCA connectors. Mounting the amplifier like I did makes these inputs tight.
- Some miscellaneous hardware including wiring, a toggle switch, wire connectors, a fuse (10 Amp ?), aluminum C-channel, bolts, wing nuts, washers, and silicon sealant. You can either by a wiring kit on Amazon or just get reasonable quality, thick (8 guage or less for battery-to-amplifier connections), speaker wire from your hardware store.